Step-by-Step Process for How to Replace Plate Heat Exchanger Gaskets
Article Summary: Gasket failure is the most common reason for reduced thermal performance and leakage in gasketed plate heat exchangers. This practical guide walks you through the complete replacement process — from identifying when a gasket needs changing, to disassembly, cleaning, adhesive application, and reassembly. Whether you maintain Alfa Laval compatible units or rely on SHPHE gasketed plate heat exchangers, this step-by-step method helps you restore efficiency and extend equipment life. We also cover common mistakes, recommended tools, and a quick FAQ section for process engineers and purchasing managers.
Why Gasket Replacement Matters for Plate Heat Exchangers
Gaskets are the sealing backbone of any gasketed plate heat exchanger. Over time, exposure to thermal cycling, chemical attack, and mechanical compression causes gaskets to harden, crack, or lose elasticity. When this happens, you experience internal leakage (cross-contamination between media), external drips, and a drop in heat transfer efficiency. Replacing gaskets at the right interval — typically every 3 to 6 years depending on operating conditions — keeps your unit running at design specifications. For overseas process engineers and purchasing managers, understanding the replacement procedure helps you plan maintenance budgets and avoid unplanned downtime.
When Should You Replace Plate Heat Exchanger Gaskets?
Look for these clear signs that it is time to replace gaskets on your gasketed plate heat exchanger:
- Visible leakage at the plate pack edges or around the frame.
- Reduced heat transfer efficiency (outlet temperatures drifting from design values).
- Increased pressure drop across the unit.
- Gasket surface feels hard, brittle, or shows cracks.
- Gasket has been in service beyond the manufacturer’s recommended life.
If you notice any of these, schedule a gasket replacement as soon as possible to prevent permanent plate damage.
Tools and Materials You Will Need
Before starting, gather the following items:
- Replacement gaskets (verify compatibility with your plate model).
- Gasket adhesive (typically a two-part epoxy or contact cement recommended by the manufacturer).
- Soft scraper or plastic putty knife (avoid metal tools that scratch plates).
- Cleaning solvent (isopropyl alcohol or a mild degreaser).
- Clean lint-free cloths.
- Torque wrench and frame tightening specifications.
- Safety gloves and goggles.
Step 1: Isolate and Drain the Heat Exchanger
Shut down the system and isolate the unit from both process lines. Close all inlet and outlet valves. Open drain valves and vent ports to release any trapped fluid. Allow the unit to cool to ambient temperature — working on a hot exchanger can cause burns and affect adhesive curing. For large units, consider using a temporary bypass to keep the rest of the process running.
Step 2: Disassemble the Plate Pack
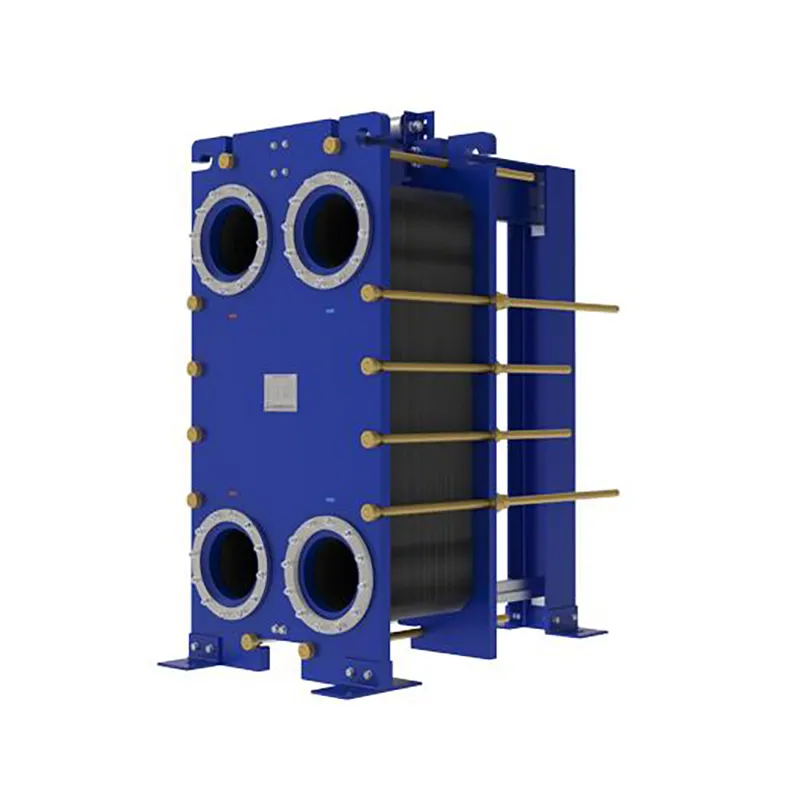
Measure and record the overall plate pack length before loosening the tightening bolts. This measurement is critical for reassembly. Loosen the bolts evenly in a cross-pattern to avoid warping the frame. Slide the movable frame back to expose the plates. Carefully remove each plate one by one, stacking them in the same order on a clean surface. Mark the orientation of each plate (most have a flow arrow) to ensure correct reassembly.
Step 3: Remove Old Gaskets
Peel off the old gasket by hand starting from one corner. If the gasket is stuck, use a soft scraper to gently lift it. Do not use a metal blade — it will gouge the plate surface and cause future leaks. For stubborn adhesive residue, apply a small amount of solvent and let it soak for a few minutes. Remove all traces of old adhesive from the gasket groove. A clean groove is essential for the new gasket to seat properly.
Step 4: Clean and Inspect Each Plate
Wipe each plate with a clean cloth and solvent to remove grease, dirt, and adhesive residue. Inspect the plate surface for pitting, cracks, or deformation. Pay special attention to the gasket groove area. If a plate is damaged beyond repair, replace it with a new one from your stock or contact your supplier. For SHPHE gasketed plate heat exchangers, plates are designed for easy gasket replacement and long service life.
Step 5: Apply Adhesive and Install New Gaskets
Apply a thin, even layer of gasket adhesive into the clean groove. Follow the adhesive manufacturer’s instructions for open time and curing. Press the new gasket into the groove starting from the center of one side, working outward to avoid air pockets. Ensure the gasket sits flush and does not twist. For clip-on or snap-in gasket designs (common on many modern units), adhesive may not be required — check your gasket type. Allow the adhesive to cure fully before reassembly, typically 2 to 4 hours at room temperature.
Step 6: Reassemble the Plate Pack
Reinstall the plates in the same order and orientation as they were removed. Slide the movable frame back into position. Tighten the bolts evenly in a cross-pattern to the manufacturer’s specified torque. Use the plate pack length you recorded earlier as a reference — do not overtighten, as this can damage gaskets and plates. Typical tightening torque for gasketed plate heat exchangers ranges from 30 to 80 N·m depending on plate size and number of plates.
Step 7: Pressure Test and Start-Up
Perform a hydrostatic pressure test at 1.3 times the design pressure to verify all seals are intact. Check for any external leakage at the plate pack edges and around the frame connections. If the test passes, slowly reintroduce process fluids, vent trapped air, and bring the unit up to operating conditions. Monitor outlet temperatures and pressure drop for the first 24 hours to confirm performance has returned to normal.
Common Mistakes to Avoid During Gasket Replacement
- Using metal tools that scratch the plate surface — always use plastic or nylon scrapers.
- Applying too much adhesive, which can squeeze out and block flow channels.
- Mixing up plate orientation — always mark flow direction before disassembly.
- Skipping the pressure test — this is the only way to confirm a leak-free assembly.
- Reusing old gaskets even if they look intact — gasket material degrades internally.
What Is the Typical Service Life of a Gasket?
Under normal operating conditions (temperatures below 150°C, pressures under 25 bar, with compatible fluids), gaskets in a gasketed plate heat exchanger typically last 3 to 6 years. Higher temperatures, aggressive chemicals, or frequent thermal cycling can shorten this life. Regular inspection every 12 months is recommended. SHPHE offers gasket kits compatible with most major brands, including Alfa Laval compatible units, with material options such as NBR, EPDM, and Viton to suit different applications.
How to Choose the Right Replacement Gasket Material?
Select gasket material based on your process fluid, temperature, and pressure. NBR (nitrile) is suitable for oils and fuels up to 120°C. EPDM works well with water, steam, and dilute acids up to 150°C. Viton (FKM) handles high temperatures up to 200°C and aggressive chemicals. Always confirm compatibility with your specific media. If you are unsure, SHPHE provides free thermal design and selection service to help you choose the correct gasket material for your application.
Why Choose SHPHE for Your Gasketed Plate Heat Exchanger Needs?
SHPHE is a Shanghai-based plate heat exchanger manufacturer founded in 2005, exporting to over 20 countries with ISO9001 and ASME U certifications. Our product lines include HT-Bloc/TP Welded Plate Heat Exchangers, Wide Gap Welded Plate Heat Exchangers, Gasketed Plate Heat Exchangers, PCHE, Plate Air Preheaters, and Pillow Plates. We offer free thermal design and selection service, ensuring your replacement gaskets and plates match your exact operating conditions. Whether you need a direct replacement for an existing unit or a complete custom-engineered solution, SHPHE delivers reliable performance and fast global shipping.
Frequently Asked Questions (FAQ)
Q: Can I replace gaskets without removing the plate pack from the frame?
A: No, you must disassemble the plate pack to access each plate individually. Attempting to replace gaskets while plates are still compressed can damage both the gasket and the plate groove.
Q: How long does a full gasket replacement take?
A: For a typical unit with 50 to 100 plates, expect 4 to 8 hours of labor plus adhesive curing time. Larger units with 200+ plates may take a full day. Plan maintenance during scheduled downtime.
Q: Can I use a generic gasket on my Alfa Laval compatible heat exchanger?
A: Yes, but only if the gasket is specifically designed as a compatible replacement. SHPHE offers gaskets that are dimensionally identical to Alfa Laval and other major brands, ensuring proper sealing and performance.
Q: What happens if I overtighten the frame bolts after gasket replacement?
A: Overtightening can crush the gaskets, deform the plates, and cause permanent leakage. Always use a torque wrench and follow the manufacturer’s specified tightening sequence and torque values.
Q: Do I need to replace all gaskets at once, or can I do individual plates?
A: It is strongly recommended to replace all gaskets at the same time. Mixed old and new gaskets create uneven compression, leading to premature failure of the newer gaskets.
Q: How do I store spare gaskets properly?
A: Store gaskets in a cool, dry place away from direct sunlight and ozone sources (like electric motors). Ideal temperature is 15–25°C. Keep them in their original packaging to prevent contamination.
Request a Quote for Your Gasket Replacement Project
Replacing gaskets on a plate heat exchanger is a straightforward process when you have the right parts and procedure. To ensure you receive the correct gasket kit and technical support, please provide the following details when contacting us: flow rate, inlet and outlet temperatures, operating pressure, and media type (including chemical composition if applicable). SHPHE’s engineering team will confirm compatibility and offer a free thermal design and selection service. We are an alternative to brands like Alfa Laval, Compabloc, and GEA, delivering high-quality gasketed plate heat exchangers and replacement parts to process engineers and purchasing managers worldwide. Reach out today to keep your heat exchanger running at peak efficiency.

 English EN





User Comments
Service Experience Sharing from Real Customers
Mike
Maintenance SupervisorI was dreading this job because our old gaskets were a nightmare to peel off. This replacement kit made the whole process surprisingly straightforward. The gaskets fit snugly, no trimming needed. Saved us a ton of downtime at the dairy plant.
Linda
Process EngineerWe swapped out a full set on a 20-year-old heat exchanger last week. The material feels durable and the adhesive held up well during assembly. Only reason it's not 5 stars is because the instructions were a bit generic, but if you've done this before, it's a breeze. Good value for the price.
Tom
Facility TechnicianHonestly wasn't expecting much for the price, but these gaskets did the job perfectly. We had a small leak on our HVAC loop, and after replacing these, no more drips. Fit my standard plate pack without any issues. Will definitely order again.
Sara
Plant OperatorFirst time I've ever had to do a gasket replacement on our brewery's pasteurizer. I was super nervous, but these were pretty forgiving. A little tricky getting the alignment perfect on the first few plates, but once I got the hang of it, the rest went quick. No leaks so far after a month of heavy use.